Wagner SprayTech PF23/PF30 Cleaning
Cleansing your airless paint sprayer properly and after every spray job is of the utmost importance! Proper care and maintenance is what is going to make your paint sprayer last and work for you trouble free. Probably half our repair work to sprayers is due to lack of and/or unsatisfactory cleaning.
These washing instructions apply to only the SprayTech ProForce series airless paint sprayers.
For additional information and assistance, give us a call at 866-208-4023
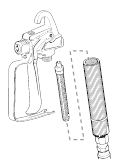
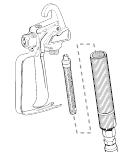
- Unclip the trigger guard from the filter housing by pulling outward from the filter housing. Unscrew the filter housing
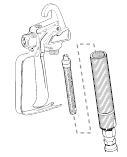
- Remove the filter from the spray gun housing and clean with the appropriate cleaning solution (warm, soapy water for latex paints, mineral spirits for oil-based materials)
- Inspect the filter for holes (see inset, right). Replace if holes are found
- Replace the cleaned filter, tapered end first, into the gun housing. The tapered end of the filter must be loaded properly into the gun. Improper assembly will result in a plugged tip or no flow from the gun
Follow these steps if you used latex materials AND if you have a garden hose available. If you do not have a garden hose available, follow the Cleanup for Oil-Based Materials instructions.
1. Lock the gun and remove the spray tip assembly. Place the suction tube and return tube into an empty waste container.

2. Using a garden hose, rinse off the suction tube, return tube and inlet filter. Empty the waste container.
3. Remove the inlet filter from the suction tube and place into a waste container.
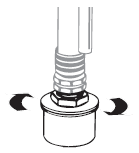
4. Verify that the seals are present inside the adapter and suction tube (a). Thread the pump cleaning adapter (b) onto a garden hose (c). Connect hose and adapter to the fitting on the end of the suction tube (d).
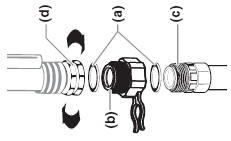
5. Unclip the return tube from the suction tube and place it into the waste container. Turn the PRIME/SPRAY knob to PRIME.

6. Turn water supply on. Turn pump ON (l). Water will go into the suction tube and out through the return tube. Let pump run for a few minutes to allow the return tube to be flushed.
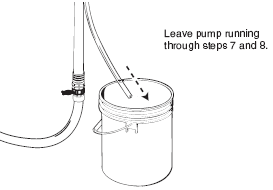
7. Place the original material container next to the waste container. Aim the spray gun into the side of the original material container and hold the trigger.

8. While pulling the trigger, turn the PRIME/SPRAY knob to SPRAY to purge material from the hose back into the original container.

9. When cleaning solution comes from the spray gun, keep holding the trigger and aim the spray gun into the side of the waste container.
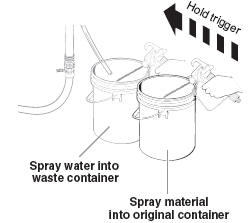
10. Trigger the gun until the fluid coming out of the gun is clear. You may need to empty the waste container and continue flushing.
11. Turn the PRIME/SPRAY knob to PRIME and trigger gun once more to relieve pressure.
1. Lock the gun and remove the spray tip assembly. Place the suction tube and return tube into an empty waste container.

2. Place a waste container next to the original material container. Aim the spray gun into the side of the

3. While pulling the gun trigger, turn the pump ON (l), and turn the PRIME/ SPRAY knob to SPRAY to purge material from the hose back into the original container.
4. When cleaning solution comes from the spray gun, keep holding the trigger and aim the spray gun into the side of the waste container (ground gun with a metal container if flushing with flammable solvent).
5. Trigger the gun until the fluid coming out of the gun is clear. You may need to dispose and obtain new cleaning solution.
6. Turn the PRIME/SPRAY knob to PRIME and trigger gun once to relieve pressure.
1. Make sure the pump is switched OFF (O). Make sure the PRIME/SPRAY knob is turned to PRIME. Unplug the sprayer.

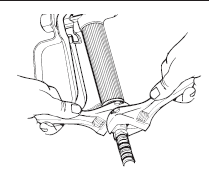
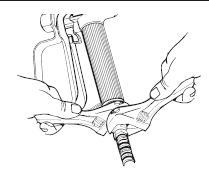
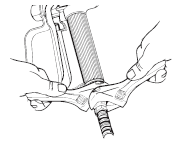
2. Remove spray gun from the paint hose using adjustable wrenches.
3. Remove filter from spray gun
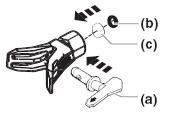
4. Remove spray tip (a) from spray guard assembly. Clean spray tip with a soft-bristled brush and the appropriate cleaning solution. Be sure to remove and clean the washer (b) and saddle seat (c) located in the rear of the spray tip assembly.

5. Install gun filter tapered-end first. Reassemble spray gun.
6. Install spray tip (a), saddle seat (c) and washer (b), and replace spray guard assembly.
7. Thread the spray gun back onto the paint hose. Tighten with a wrench.
